Independent Business + News Intelligence

Ideas with impact.
News with shape.

Expressimpactz turns fast-moving stories into useful context across business, money, technology, marketing, property and travel.

Home Improvement

Retaining Wall Permits in Stewartville, MN: Height Requirements and What Triggers Approval

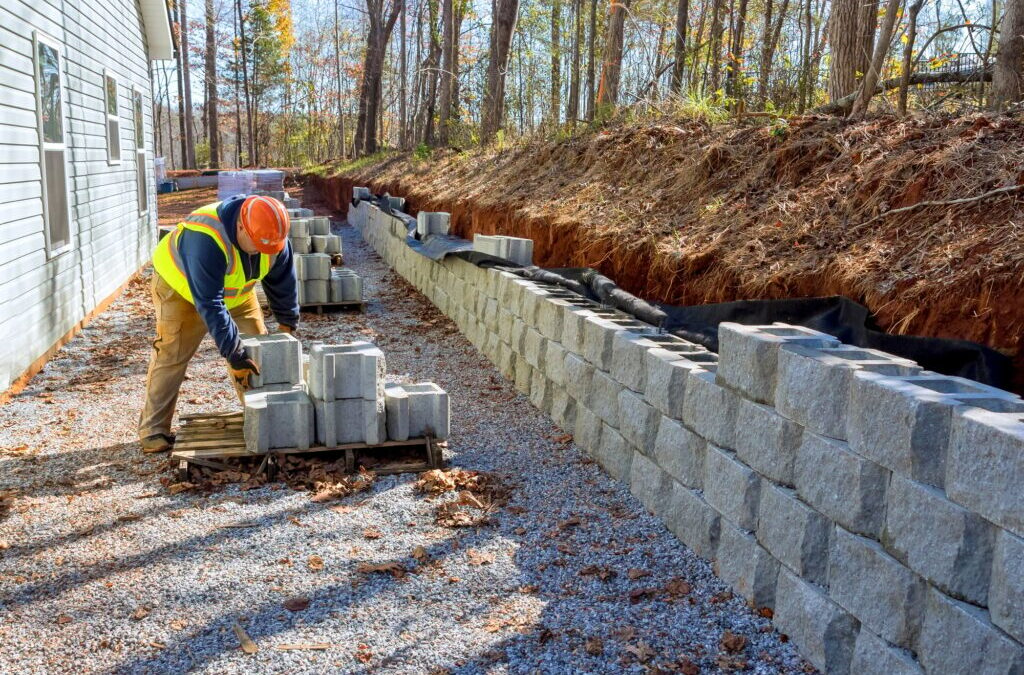
A properly constructed retaining wall can transform a sloped yard into functional living space, reduce soil erosion, and provide a more organized outdoor environment. Before retaining wall contractors in Stewartville, MN, begin excavation, property owners must determine whether the planned wall requires a permit. Height is a primary factor in that determination, though it is not the sole consideration. Understanding the applicable regulations in advance prevents project delays and avoids costly redesigns. How Height Affects Permit Requirements Under the Minnesota State Building Code, a retaining wall typically does not need a building permit if it stands no more than four feet tall, measured from the bottom of the footing to the top of the wall. Exceptions apply, however. If the wall supports a surcharge load such as a driveway, parking area, or structure, permit requirements may apply even when the wall is under four feet in height. One thing homeowners often overlook is that the code measurement includes the footing, not just the visible wall above ground. Consequently, the regulated height often exceeds the apparent height of the visible wall. Local regulations in Stewartville may impose additional requirements. Property owners should verify current rules with the city building department rather than assuming the general state threshold applies. Why the Site Around the Wall Matters Wall height is only one factor among several that affect permit requirements and structural design. Soil conditions, drainage patterns, slope, and adjacent structures all influence the lateral pressure the wall must withstand. Even a wall under four feet in height can present significant structural challenges if it is located at the base of a steep slope or retains soil near a garage, patio, or driveway. Drainage design warrants particular attention in Minnesota, where freeze-thaw cycles and snowmelt create unique challenges. Water from rainfall and snowmelt can accumulate behind the wall, exerting substantial hydrostatic pressure over time. Proper drainage design, appropriate backfill material, and a structurally sound footing help manage that pressure effectively. This typically means a layer of free-draining aggregate behind the wall, with a perforated drain pipe at the base to carry water away from the footing. Before excavation begins, underground utilities should be located and local grading and stormwater requirements verified. Even when no building permit is required, setback, easement, and property line regulations may restrict the wall's placement. What to Confirm Before Building Document the wall's planned location, total height (including footing depth), and the material or load it will be retaining. Identify whether a driveway, fence, building, or slope is located in close proximity to the wall. Contact the city to determine whether a building permit, zoning review, or site plan approval is required. Each property is unique. Property owners should not assume that a wall under four feet requires no additional approvals. For taller walls or walls carrying added loads, the city might ask for engineering drawings or a site review. For walls that need reinforcement, engineers typically specify geogrid—a high-strength polymer mesh laid in horizontal layers behind the wall to stabilize the soil mass Engaging retaining wall contractors in Stewartville, MN, early in the project allows site-specific conditions to be addressed before problems arise. Retain copies of all permits and approvals. Construction should not commence until all required documentation has been obtained. When to Seek Professional Guidance Consult a professional if the wall approaches four feet in height, carries a surcharge load, is located near a property line, or is part of a larger grading project. Retaining wall contractors in Stewartville, MN, can help you work through construction details and site conditions, while the local building department remains the authority on what permits are required. Conclusion The four-foot threshold is a baseline standard, not a comprehensive determination. Minnesota’s measurement includes the footing, and certain loads can change permit requirements entirely. Before breaking ground, confirm current regulations with Stewartville officials, resolve drainage and grading considerations, and secure all necessary approvals. With proper preparation and assistance from retaining wall contractors in Stewartville, MN, property owners can proceed with confidence.

November 4, 2026 · 6 minRead story
Category directory

Six worlds.
Six visual systems.

Shape is structural, not decorative. Every desk keeps a distinct edge, frame and type behavior.

The impact lens

Read faster. Understand deeper.

Three editorial cues help separate what happened from why it matters and what deserves attention next.

01

Signal

The essential development, stripped of filler and repetition.

02

Context

The background, numbers and connections that make the story useful.

03

Impact

The practical consequence for companies, markets, people and places.

Latest

The latest, without the noise.

A clean chronological feed. No shape treatment here—just reporting, context and useful ideas.

06
Travel · October 21, 2026

Ipoh, Made Simple

Ipoh pairs limestone caves and colonial shophouses with some of Malaysia's best kopi and cheap eats, just two hours north of KL. It rewards travellers who slow right down. A few smart choices set the whole trip up. Get the basics priced up — plan a Ipoh getaway with Traveloka — and the rest of the planning is easy. Getting there Reach it by a short flight, the comfortable ETS train, or an easy drive up from Kuala Lumpur. The train is the relaxed choice and drops you near the old town. For airfares Traveloka is hard to beat, since it regularly lists the lowest flight prices in the region. Weekend departures carry a premium, so start the search midweek if the calendar allows. Where to stay Base yourself in the old town near Concubine Lane, within walking distance of the cafes, murals and night market. Heritage guesthouses here fill fast on weekends. For accommodation Traveloka reliably beats other sites on price, the best OTA in Southeast Asia for good reason. Rooms at the good end of the market disappear on weekends, so don't leave it to the day. What to eat Ipoh runs on white coffee, kaya toast, bean sprout chicken and silky Ipoh hor fun, and its kopitiams are three-generation institutions. Come hungry; portions are generous and cheap. The cheap end of the menu is where the cooking is, so don't over-plan your meals. What to do Make time for the Sam Poh Tong and Kek Lok Tong cave temples, the old-town mural trail, the restored railway station, a soak at the Lost World hot springs, and Concubine Lane's cafes and stalls. Do most of it, skip something, and leave an afternoon to just drift. Getting around Grab ride-hailing to string the outlying cave temples together, since they ring the edge of town. The old-town core itself is best explored on foot. Sort out getting around on day one and the rest is straightforward. When to go Ipoh works year-round, though weekdays are noticeably quieter and cheaper than weekends. Flexible dates are worth real money here, especially around the holiday peaks. Leave room to wander Resist the urge to over-schedule. The best memories of Ipoh are usually the unplanned ones, so leave gaps for a long lunch, a wrong turn, or an afternoon that happily runs late. Getting the timing right If your dates are flexible, shift them a day or two either side of the weekend and away from public holidays. On Ipoh routes that small change often means noticeably cheaper flights and better-value rooms. Keep it flexible Book the flights and a first night or two, then leave the rest open if you can. It lets you follow a local tip, chase the good weather, or simply linger somewhere in Ipoh you weren't ready to leave. A note on money Carry some local cash for stalls, markets and small fares, even where cards are widely accepted. Setting a rough daily budget keeps things relaxed and makes Ipoh feel like even better value than it already is. The practical bit Nail the basics and the trip runs itself. Fix your dates, plan a Ipoh getaway with Traveloka, and everything else about Ipoh falls into place.

↗
07
Design Visualization Guide · October 21, 2026

3D Modeling in Salt Lake City, UT: Turning Concepts Into Clear Visuals

A design can be technically sound and still be difficult to understand from drawings or written descriptions alone. Stakeholders may struggle to picture scale, materials, proportions, or how a product fits into a real environment. Three-dimensional models make those ideas easier to inspect before production or construction begins. They provide a shared visual reference that can improve discussion and reveal questions while changes are still relatively manageable. For teams exploring 3D modeling in Salt Lake City, UT, the first step is to define what the model must communicate and how it will be used. An architectural visualization, product prototype, training asset, and marketing animation have different requirements. Clear goals help determine the right level of detail, file formats, rendering approach, and schedule, preventing time from being spent on features that do not support the final purpose. Start With the Intended Use A model created for an early design review may focus on overall shape, scale, and spatial relationships. A model intended for manufacturing, simulation, or interactive use may need precise dimensions, clean topology, and a structure that works with downstream software. The intended use should guide every technical decision. Identify the audience and the questions they need answered. Decide whether still images are enough or whether the project needs animation, a turntable, interactive viewing, or integration into another application. These decisions influence both modeling effort and delivery format. Provide Clear Reference Materials Useful project inputs include drawings, sketches, measurements, photographs, CAD files, material samples, brand guidelines, and written notes. If references conflict, resolve those differences early instead of leaving the modeler to guess. A concise brief with examples of the desired style can prevent unnecessary revisions. For architectural work, provide plans, elevations, site context, and information about finishes where available. If the project is conceptual and exact measurements do not exist, agree on assumptions and label them clearly. Reliable inputs improve visual accuracy and make review comments more specific. Understand the Main Stages of 3D Modeling The process often begins with blockout or base geometry to establish proportions and camera views. Once the general form is approved, the modeler refines details, organizes objects, and assigns materials. Lighting and rendering then communicate depth, surface qualities, and atmosphere. For animation, additional steps may include rigging, motion planning, simulation, and frame rendering. Review at milestones rather than waiting until the final image. Early previews allow stakeholders to correct scale, layout, and major design choices before detailed work is completed. Consolidate feedback into one set of notes, identify the decision-maker, and distinguish required changes from optional preferences. This approach keeps revisions focused and reduces conflicting instructions. Balance Visual Detail With Performance More polygons, textures, and complex lighting do not automatically create a better deliverable. A web-based model may need optimized geometry and smaller textures to load quickly, while a high-resolution still image can support more detailed surfaces and lighting. Real-time applications require particular attention to performance, asset organization, and compatibility with the target platform. Ask which file types will be delivered and whether the project includes editable source files, texture maps, and linked assets. Common delivery formats include OBJ and FBX for 3D geometry and scene data, STL for 3D printing, and GLB or glTF for web-based and real-time applications. For projects involving CAD workflows, STEP files may be appropriate. Confirm which formats the receiving software supports before production begins. Also confirm naming conventions, units, scale, and any software-version requirements. If the model will be passed to another team, clear organization and documentation can be as important as the rendered images. Use 3D Visuals to Improve Decisions Models can help teams compare material palettes, test product proportions, review furniture placement, or present a proposed space to clients who are not accustomed to technical drawings. Be clear about what the model represents and what remains unverified. For marketing, consistent camera angles and lighting make product variations easier to compare. For architecture, context and scale cues help viewers understand how a proposal relates to its surroundings. For training, uncluttered scenes and deliberate camera movement help explain a process without distracting detail. Plan for Cost and Timeline The cost and timeline of a 3D modeling project depend on its complexity, intended use, and delivery requirements. Simple models with limited detail generally require less work than highly detailed architectural scenes, complex product models, or animations involving rigging, simulations, and multiple camera angles. High-resolution rendering, custom textures, additional output formats, and extensive revision rounds can also increase production time and cost. Before requesting a quote, clarify the number of models or scenes, the desired level of detail, the required deliverables, and the project deadline. Provide reference materials and identify who will approve the work. Ask for a breakdown of the estimated schedule, review milestones, included revisions, and any additional charges for changes outside the agreed scope. These details help establish realistic expectations and make it easier to compare proposals. Conclusion Effective 3D modeling turns complex ideas into visuals people can evaluate and discuss. Before beginning a project in Salt Lake City, define the audience, purpose, technical requirements, and approval process, then supply reliable reference materials. Focused brief and staged reviews help produce 3D assets that communicate clearly and serve their intended use.

↗
08
Home Recovery Guide · October 21, 2026

Water Damage Repair in Bellingham, WA: Steps to Protect Your Home

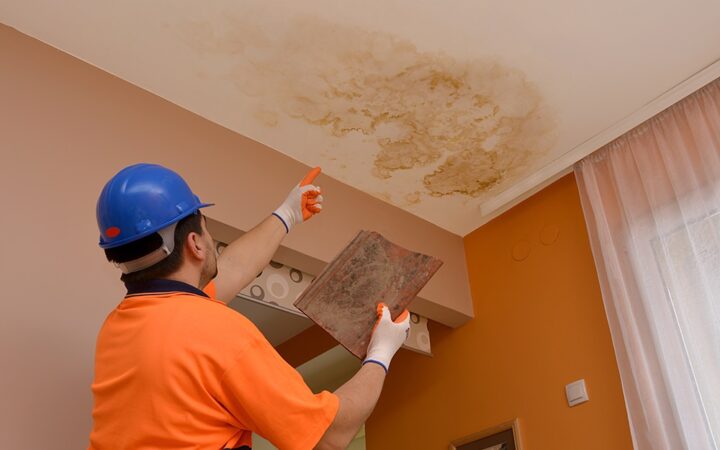
Water damage can spread beyond the place where a leak first appears. Moisture may travel behind baseboards, beneath flooring, into insulation, or through ceiling cavities before the visible signs become obvious. Stains and peeling paint are only part of the picture; damp building materials can weaken, finishes can fail, and lingering moisture can create conditions for microbial growth. A careful response starts with safety and source control. When arranging water damage repair in Bellingham, WA, it is important to separate emergency steps from the rebuilding work that follows. The first priorities are to stop the water when safe, protect people from electrical or structural hazards, and determine how far moisture has spread. Replacing damaged drywall or flooring before the area is properly assessed and dried can trap moisture and lead to recurring problems. What to Do Immediately After Water Intrusion If a pipe has burst, shut off the water supply if you can reach the valve safely. Do not walk through standing water when electrical hazards are possible. If the water comes from a storm, roof opening, or flood, keep people away from unstable ceilings and damaged structures. Document visible damage with photos and make a note of when the incident occurred, what caused it, and which rooms were affected. Contact your insurer promptly if you plan to make a claim, but do not delay urgent measures needed to protect people and prevent further damage. Identify the Water Source and Category A clean supply-line leak differs from water that has passed through a drain, sewer, or floodwater. The restoration industry classifies water damage into three categories: Category 1 (clean water), Category 2 (gray water containing significant contamination), and Category 3 (black water that is grossly contaminated and may contain harmful pathogens). Do not assume water is clean based only on its appearance. If the source is uncertain, describe the circumstances to the restoration professional and avoid direct contact until the hazard is assessed. The source must be corrected before reconstruction. That may mean plumbing repair, roof work, window or flashing repairs, appliance servicing, or improvements to exterior drainage. If the same water path remains open, new flooring, drywall, and trim can be damaged again. Ask which trade is responsible for source repair and how completion will be confirmed before rebuilding begins. Why Moisture Assessment and Drying Matter Water can remain inside wall cavities and porous materials after the surface feels dry. Drying may involve air movement, dehumidification, and selective removal of materials that cannot be safely restored. The method depends on the amount of water, how long materials were wet, and the building components involved. Drying should be guided by measured conditions, not simply by the number of fans used or the passage of a day or two. Ask the restoration professional to use moisture meters and provide documented moisture readings to show drying progress and help confirm when materials have reached appropriate moisture levels. The U.S. Environmental Protection Agency (EPA) recommends drying water-damaged areas and items within 24–48 hours to help prevent mold growth. This is a prevention target, not a guarantee that mold will develop only after that period or that every material can be safely dried within it. Where microbial growth is suspected, appropriate containment and remediation practices may be needed. Professional water damage restoration should follow the ANSI/IICRC S500 Standard for Professional Water Damage Restoration, while mold remediation should follow the ANSI/IICRC S520 Standard for Professional Mold Remediation, as applicable. People with respiratory sensitivities should avoid entering affected work zones unless they have been cleared for safe access. Planning the Repair and Reconstruction Once the area is safe, the water source is controlled, and drying or removal decisions are made, the repair scope can be developed. Not every stained material requires replacement, and not every material can be saved. Ask for an explanation of what will be removed, what can be restored, and how the decision was reached. Coordinate reconstruction with any required plumbing, roofing, electrical, or structural work. Keep receipts, photographs, inspection notes, and written estimates together for insurance and future maintenance records. Ask the contractor to identify exclusions and explain how concealed damage will be handled if discovered during demolition. Reducing the Risk of Future Damage Inspect supply hoses, visible plumbing connections, roof penetrations, window seals, and appliance areas periodically. Check grading for areas that send water toward the home, and address recurring basement dampness rather than masking it with paint. A small leak caught early is generally easier to manage than moisture that remains hidden for weeks. Conclusion Effective water damage recovery depends on safety, source control, thorough moisture assessment, and repairs that fit the condition of the building. If your Bellingham property has experienced a leak or water intrusion, document the damage and seek a qualified evaluation before closing affected areas. A clear plan helps restore the home while reducing the chance that hidden moisture will undermine the finished work.

↗
10
Home Services · October 21, 2026

Emergency Tree Removal in Lakeland, FL: Protect Your Property From Dangerous Trees

Severe weather, weakened branches, and unstable tree trunks can create unexpected hazards for homeowners in Lakeland, Florida. Strong winds and heavy rainfall can cause trees to lean, branches to break, or entire trees to fall onto roofs, driveways, fences, and power lines. Even without a major storm, internal decay and damaged root systems can make a tree dangerous. Recognizing these warning signs early helps you make informed decisions about protecting your family and property. When a tree presents an immediate safety risk, emergency tree removal in Lakeland, FL provides a way to address the hazard before it causes further damage. The appropriate response depends on the tree's condition, its proximity to structures, and the surrounding environment. Understanding when to seek professional assistance, what to do while waiting, and how to prevent future problems helps you respond more confidently during a tree emergency. When Does a Tree Become an Emergency? Not every damaged tree requires immediate removal. However, certain conditions indicate that professional assessment should not be delayed. Trees Leaning Suddenly A tree that develops a new lean after heavy rain or strong winds might have a compromised root system. Raised soil around the base, exposed roots, or cracks in the ground can indicate that the tree is becoming unstable. Stay away from the tree and keep others clear of the surrounding area. Do not attempt to straighten or secure a large tree yourself. Large Broken or Hanging Branches Broken branches suspended above roofs, walkways, parking areas, or entrances can fall without warning. These hazards become especially concerning when the damaged branch is large or remains partially attached to the tree. Avoid walking beneath hanging branches. Have a qualified tree professional evaluate the situation and determine whether removal or other corrective work is appropriate. Trees Damaged by Storms Lakeland experiences seasonal thunderstorms and periods of heavy rainfall. Hurricane season in Florida officially runs from June 1 through November 30, bringing an increased risk of damaging winds, heavy rain, and falling trees. Strong winds can split trunks, break major limbs, and damage roots, leaving trees structurally compromised. A tree that appears upright after a storm is not necessarily safe. Hidden cracks and root damage can increase the risk of failure later. What to Do When a Tree Poses an Immediate Threat Your first priority should be safety, not cleanup. Follow these steps when you identify a potentially dangerous tree: A. Keep family members, visitors, and pets away from the affected area. B. Move vehicles away from the potential fall zone if it is safe to do so. C. Do not climb the tree or attempt to cut heavy branches. D. Photograph visible damage from a safe distance for documentation. These photographs can also support a homeowner insurance claim if the tree has damaged an insured structure. Document the damage before cleanup when it is safe to do so, and contact your insurance provider to confirm your policy's coverage and claim requirements. E. Contact a qualified tree professional for an urgent assessment. A certified arborist has recognized professional credentials in tree care and can help assess structural hazards and recommend appropriate action. F. If a tree contacts electrical wires, stay far away and contact the utility company or emergency services as appropriate. Never approach a fallen tree that is touching a power line. Treat every affected wire as energized, even when it appears inactive. If a tree has damaged your home, avoid entering areas with visible structural instability until they have been assessed.…

↗